Used equipment
– Any Raspberry pi (preferably a RPi 4, but an Pi 3 will do just fine)
– Raspberry Pi power supply
– Micro SD card
– External Monitor & HDMI cable (or a VNC/SSH connection)
– Keyboad en mouse when using external monitor
What is the Raspberry Pi?
The Raspberry Pi is a series of small single-board computers developed in the UK by the Raspberry Pi Foundation.
The initial 2 designs (the A and B version) were develloped to promote teaching of basic computer science in schools and developing countries. But ofcourse it didn’t end there, after all the original models became far more popular than anticipated.
They were selling great outside its target market for uses such as Robotics, R&D projects and ofcourse the IOT. It might not include peripherals (such as keyboards and mice) or cases. However, some accessories have been included in several official and unofficial bundles.
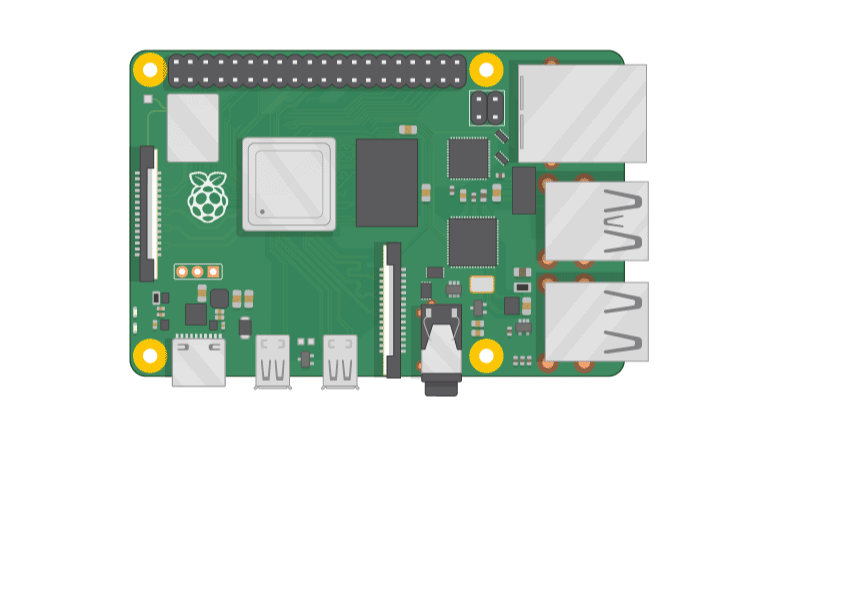
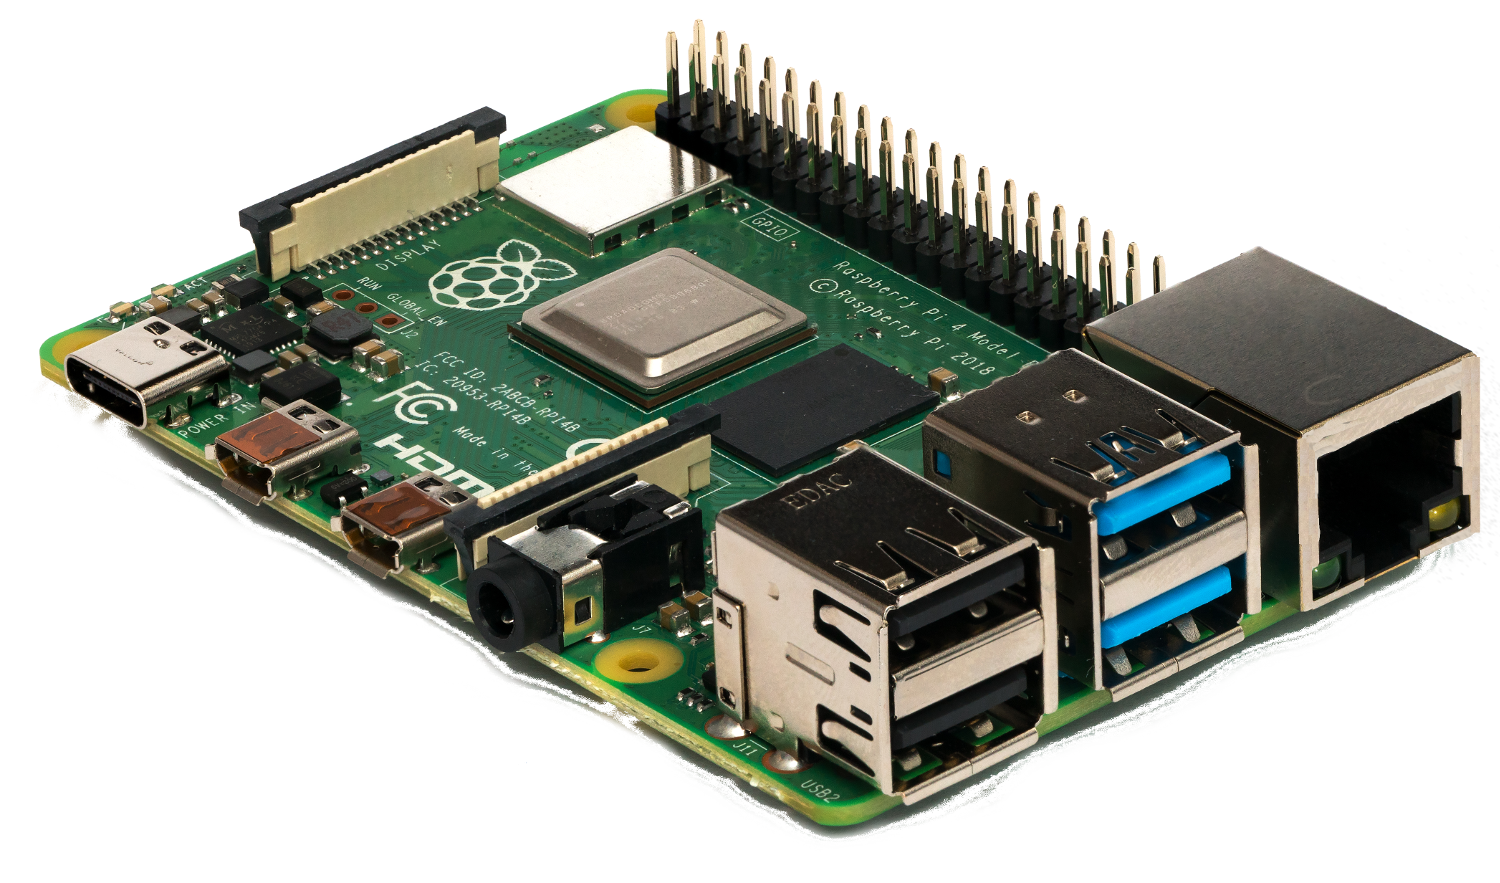
Meet the Raspberry Pi
Lets take a first look at the Mini Computer.
Can you identify every ‘component’?
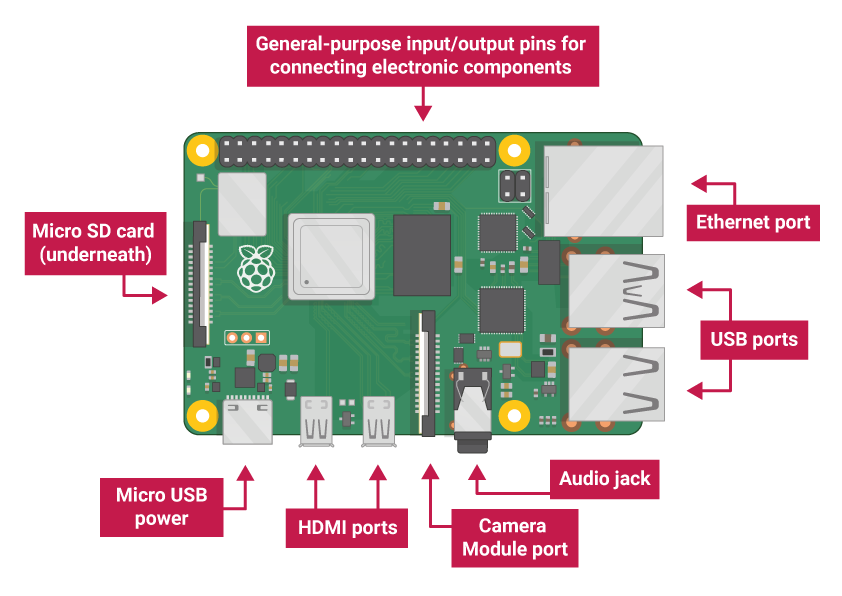
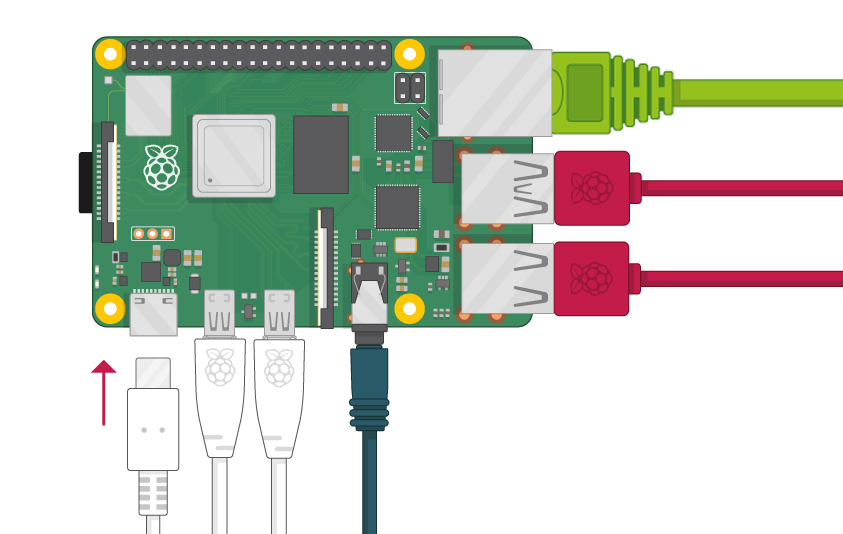
- USB ports — these can be used for most usb devices. Most of them won’t require any extra drivers.
- SD card slot — the one and only place where you put your SD card with the OS system.
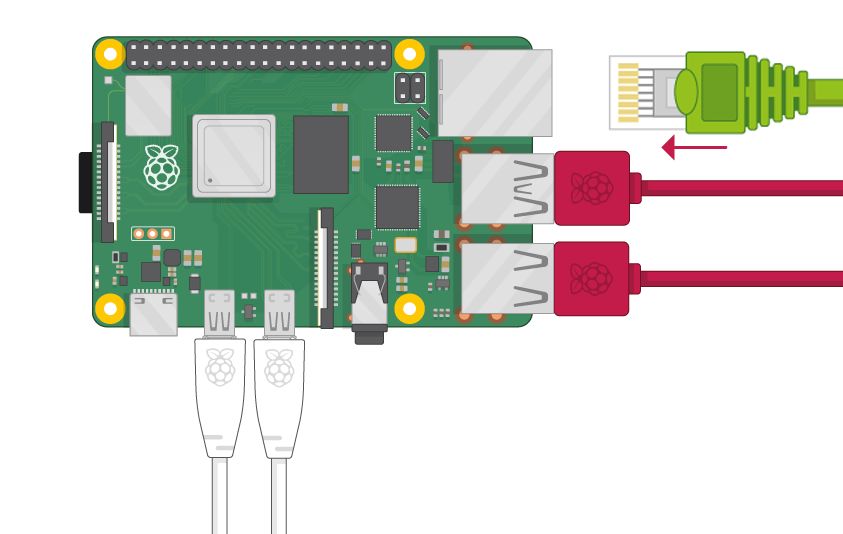
- Ethernet port — A network connection is in most cases a nice plus or even a must. Raspberry Pi can also connect to a network via wireless LAN.
- Audio jack — you can connect headphones or speakers here.
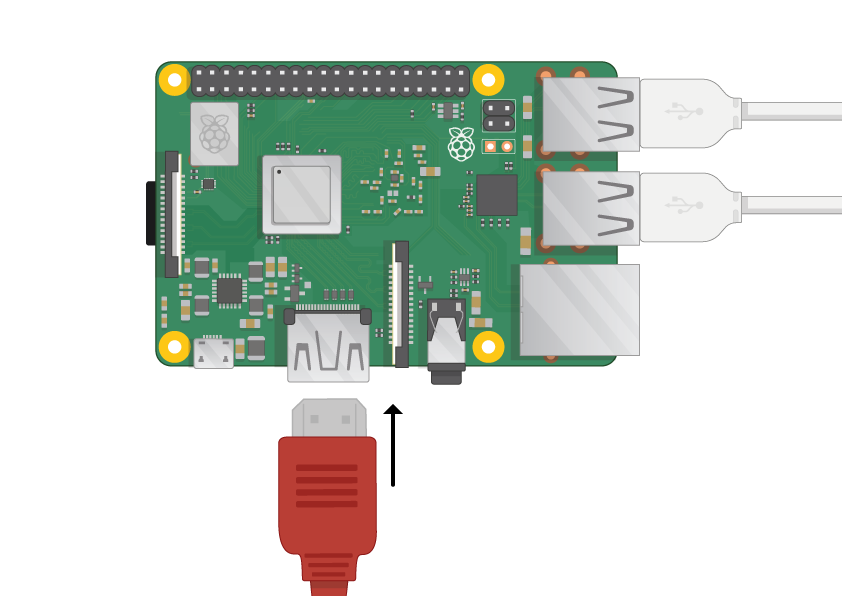
- HDMI port — this is where you connect the monitor (or projector) that you are using to display the output from the Raspberry Pi. If your monitor has speakers, you can also use them to hear sound. For small screens, like the official rpi touchscreen, you can use the ZIF socket.
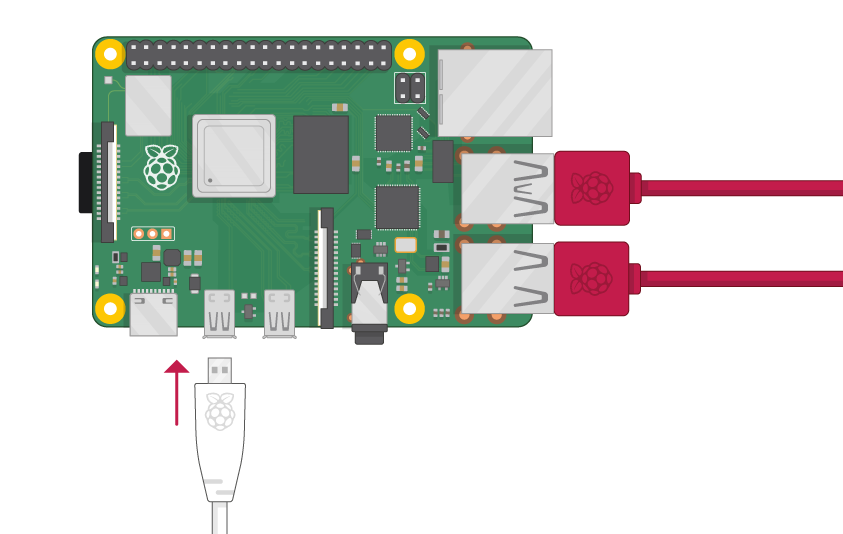
- Micro USB power connector — this is where you connect a power supply. You should always do this last, after you have connected all your other components.
- GPIO ports — these allow you to connect electronic components such as LEDs and buttons to the Raspberry Pi.
Let’s get Started
Lets get your pi running.

The Pi as a micro sd card slot on the underside. This is where you need to put the burned SD card in.
You can find our tutorial on how to burn your sd card here.
If you want to use a mouse, keyboard and screen, now is the time to connect them.
Use a HDMI cable (or a hdmi converter) to connect your screen.
In most cases you’ll want to connect the Pi to the internet.
The best way to do this is using Ethernet, use an Ethernet cable to connect the Ethernet port on the Raspberry Pi to an Ethernet socket on your switch or router.
You don’t need to do this if you want to use wireless connectivity, or if you don’t want to connect to the internet.
Now that all peripherals are connected, all thats left to do is connect the power to the Pi.
For the Pi 4 a 3A or more power supply is recommended, for the other Pi’s a 2A or 2,5A power supply is recommended.
If you connected a monitor, and when everything went the right way, you should see the desktop of console screen (depending on the version of raspbian you installed).
The finishing Touch
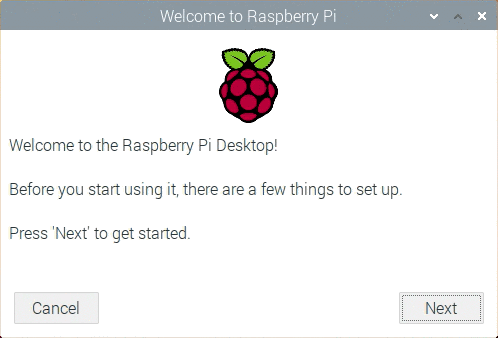
When you start your Raspberry Pi for the first time, the Welcome to Raspberry Pi application will pop up and guide you through the initial setup.
- Click Next to start the setup.
- Set your Country, Language, and Timezone, then click Next again.
- Enter a new password for your Raspberry Pi and click Next.
- Connect to your WiFi network by selecting its name, entering the password, and clicking Next. (OPTIONAL)
Note: if your Raspberry Pi model doesn’t have wireless connectivity, you won’t see this screen. - Click Next let the wizard check for updates to Raspbian and install them (this might take a little while).
- Click Done or Reboot to finish the setup.
Note: you will only need to reboot if that’s necessary to complete an update.
Just desire to say your article is as amazing.
The clearness in your post is simply excellent and i could assume you are an expert on this subject.
Fine with your permission let me to grab your RSS feed to keep
updated with forthcoming post. Thanks a million and please continue the enjoyable work.
Spot on with this write-up, I seriously believe this site needs
a lot more attention. I’ll probably be back again to read
through more, thanks for the info!